What is Happening in Our Garden
GLOUCESTER COMMUNITY GARDEN
HOW TO SET UP WICKING BEDS
Wicking beds are designed to reduce water use in the garden.
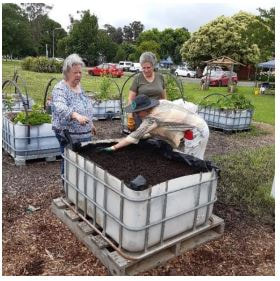
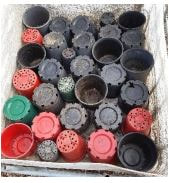
The principles below can be applied to any sized container which holds water, so you can make a wicking bed from a 1m x 1m halfIBC, a bucket, a tub or even a bath. There is a water well in the base filled with some empty plant pots and some pots containing fine sand which wicks the water up to the soil; a fabric (like weed mat or geotextile) which goes on top of the pots to separate the layer of sand and the enriched potting soil on top. A drain hole is drilled just above the pots to stop the water overflowing. The beds need to be levelled before they are filled.
Supplies:
• Half an IBC or a bucket, tub, bath, etc
• Empty plant pots – 25x20cm pots or tube stock pots and smaller pots to fill in the gaps and level the pot layer.
• Weed mat to hold up the sand/soil (wide enough to reach the top edges of container) • Fine builders sand • Coco coir or similar material
• Potting soil mix plus additives (see recipe below)
• Spade bit & drill to make drain hole at the top of pots for draining
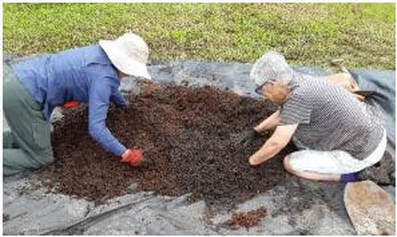
• 12mm hose connector (to go in the drain if you wish to attach a hose to fill the water well) OR polypipe (about 90cm wide x 35cm long for IBCs or 4cmx30cm for smaller pots) to place in a corner of the bed to fill water well by hand. The pots are arranged in the bottom of the tubs and the upright pots (with a small piece of weed mat placed in the bases) are filled with sand (mounded at the top). The drain hole is drilled in one side of the tub about the height of the top of the pots layer. The weed mat is placed over the pots and a 4-6cm layer of sand goes over that (the sand helps with the wicking process). After that comes a lot of barrowloads of soil mix to fill the IBC beds – not so much for buckets etc. The polypipe (for easy filling) is placed in a corner behind the weed mat and on top of the pots. Insect nets can be fitted later. Easiest way to mix a lot of ingredients is to get down and dirty!
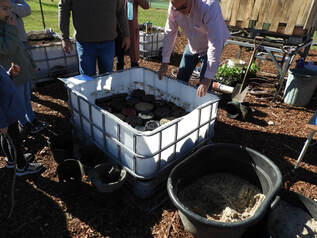
The pots are arranged in the bottom of the tubs and the upright pots (with a small piece of
weed mat placed in the bases) are filled with sand (mounded at the top). The drain hole is drilled in one side of the tub about the height of the top of the pots layer. The weed mat is placed over the pots and a 4-6cm layer of sand goes over that (the sand helps with the wicking process). After that comes a lot of barrowloads of soil mix to fill the IBC beds – not so much for buckets etc. The polypipe (for easy filling) is placed in a corner behind the weed mat and on top of the pots. Insect nets can be fitted later
weed mat placed in the bases) are filled with sand (mounded at the top). The drain hole is drilled in one side of the tub about the height of the top of the pots layer. The weed mat is placed over the pots and a 4-6cm layer of sand goes over that (the sand helps with the wicking process). After that comes a lot of barrowloads of soil mix to fill the IBC beds – not so much for buckets etc. The polypipe (for easy filling) is placed in a corner behind the weed mat and on top of the pots. Insect nets can be fitted later
Easiest way to mix a lot of ingredients is
to get down and dirty!
to get down and dirty!
RECIPE for WICKING BED SOIL MIX (ENOUGH TO GO IN HALF AN IBC) (thanks to Marnie Johnson)
3 barrowloads of compost (Check pH and adjust if necessary - under 7 is the preferred pH level)
2 barrowloads of coco coir (about 2 dry bricks when dampened). Use coir with no additives and finely processed.
1 cup of blood and bone per barrowload
2-3 cups chook pellets (or other high-nitrogen, aged manure) per barrowload
Potash – about 1 capful per barrowload
Chelated trace elements (as per label)
Seasol or seaweed extract
Charlie Carp fertiliser
Worm castings or soil probiotics (like Biocast)
Wicking Soil Recipes
Here are some sample recipes for making a growing medium that will wick.
1). This mix works for us... 2-3 parts compost, 2 parts coconut coir, 2 buckets of sheep manure or other sterilised manure, ¼ part of sand (if compost doesn't have sand in it), 4 handfuls blood and bone, 3 handfuls rock phosphate (however you can use whatever
fertilisers you prefer). Mix well and wet before putting in wicking bed.
2). 2 parts clean garden topsoil (beware of transferring wilt and other diseases which are present in a lot of Gloucester soils. If you use soil we suggest you solarise it for a month before using it), 4 parts good quality compost, ½ part sand, 2 buckets quarry rock dust and crushed biochar (if available).
3). A good quality lightweight potting mix will work. This is because heavy clay
overloaded with organic material will tend to compact. But a lightweight mix will drain freely and allow the wicking to work. The water will draw up from the base and go to the root zone where it’s needed. Add fertilisers.
4). 50% potting mix and up to 50% sand. This is a heavy mix but works. Add fertilisers (and manure if you want).
We also add composting worms in a mini worm farm (covered garden pot).
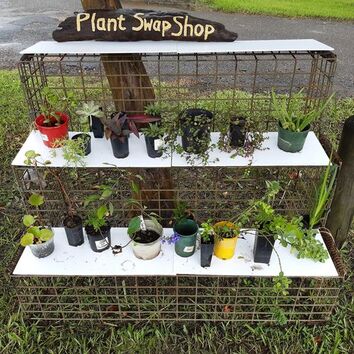
INTRODUCING OUR PLANT SWAP SHOP!
We loved the idea of the plant 'street library' featured on Gardening Australia recently so have started our own for everyone to join in.
Feel free to bring along a potted plant or three or some cuttings and swap them for others in the 'Shop' at the Community Garden near the swimming pool. Have fun propagating your favourite plants and stock up the shelves.
"OUR GARDEN’S SHED - WE NAMED IT ‘MIKE’
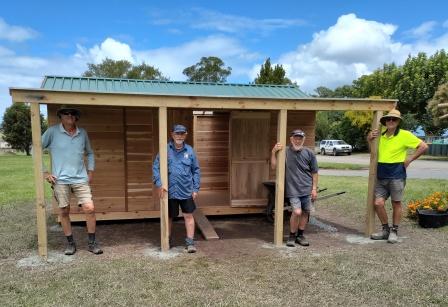
On Friday 25th February 2022 we held a ceremony to remember our dear friend and treasurer Mike Coleman, who sadly passed a couple of weeks earlier. We placed a small sign on the shed, simply saying “Mike” (alongside two chillies).
Mike contributed an enormous amount of his time and effort over the last two years to the building of our Community Garden, culminating in the new shed only days prior to his passing. It is fitting that the shed bears his name.
We were able to secure funding for the shed and also a water tank (which we will be installing soon). This was from the MidCoast Council under the 2021/22 Disaster Recovery and Resilience Grants program.
Our Community Garden is for the whole of Gloucester. By working in or simply enjoying the Garden, our community becomes stronger and more resilient."
"The shed builders - captain Tom and helpers Mike, Steve and Tibor".
A Living Fence
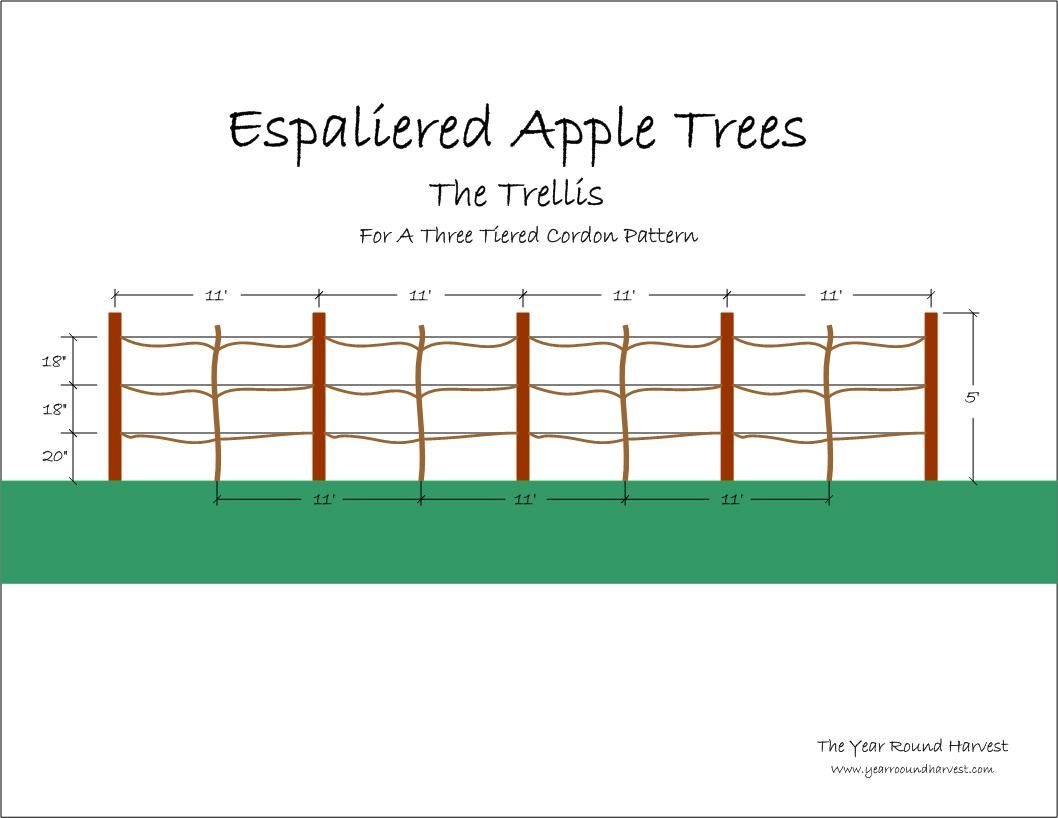
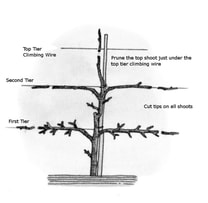
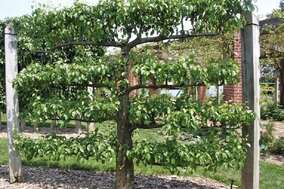
Our current project is to create a ‘living fence’ around the garden. The first stage is a row of espaliered fruit trees along the eastern boundary of our site, next to the tennis courts. The ‘garden’ sub-committee (Pippa, Terry, Maggie) is currently checking out and purchasing the materials needed and planning what trees we will plant. They figure there is room for 9 in total. Different kinds of trees respond to different shapes of espaliering, apparently.
On Saturday, July 17 at 12noon (weather and Covid restrictions permitting), we will have a special day where we invite all members (including the current inaugural committee members) to come along and meet each other, to have lunch and a chat, and, if there’s time, to work on setting up the espalier frames and preparing the soil for planting.
What is espaliering? And how is it done? The best description we’ve found is https://www.sgaonline.org.au/espaliering-trees/. Have a read and see why we’re all so excited about it.
